AWS Bastion Host Setup Guide
Introduction
In production environments, EC2 instances are placed in Private Subnets for security. However, instances in Private Subnets cannot be accessed directly from the internet.
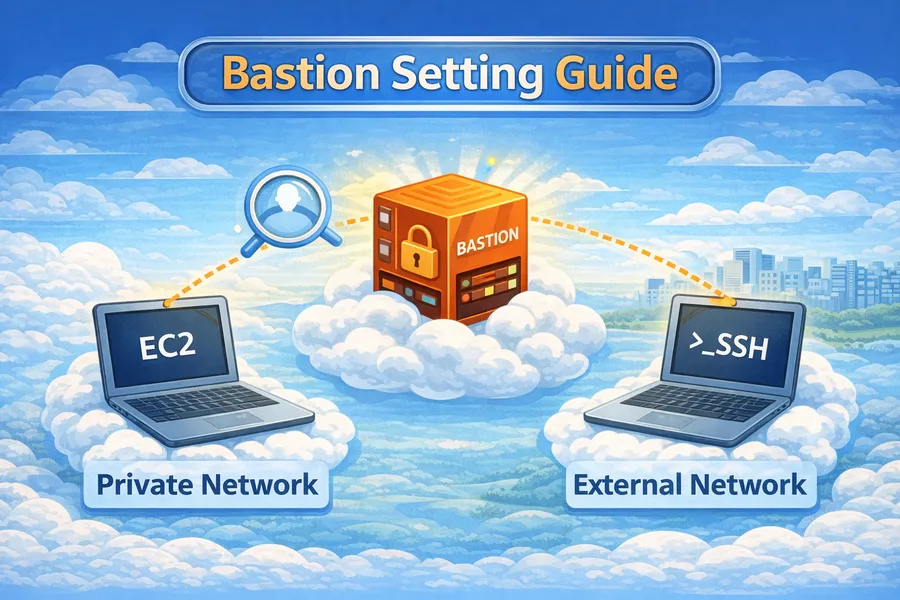
This is where a Bastion Host (jump server) enables secure SSH access. This article covers everything from Bastion Host architecture design to setup, access methods, and security hardening.
What is a Bastion Host?
A Bastion Host is a relay server used to access internal networks from the outside. It resides in a Public Subnet, making it accessible from the internet, and relays SSH connections to instances in Private Subnets.
┌────────────────────────────────────────────────────────────┐
│                        Internet                            │
│                           │                                │
│                           ▼                                │
│  ┌──────────────────────────────────────────────────────┐  │
│  │                        VPC                            │  │
│  │                                                       │  │
│  │  ┌─────────────────────────────────────────────────┐ │  │
│  │  │                 Public Subnet                    │ │  │
│  │  │                                                  │ │  │
│  │  │    ┌──────────────────┐                         │ │  │
│  │  │    │  Bastion Host    │ ◄── SSH (Port 22)       │ │  │
│  │  │    │  (Jump Server)   │     Accessible from     │ │  │
│  │  │    └────────┬─────────┘     the internet        │ │  │
│  │  │             │                                    │ │  │
│  │  └─────────────┼────────────────────────────────────┘ │  │
│  │                │ SSH                                  │  │
│  │                ▼                                      │  │
│  │  ┌─────────────────────────────────────────────────┐ │  │
│  │  │                Private Subnet                    │ │  │
│  │  │                                                  │ │  │
│  │  │    ┌──────────┐  ┌──────────┐  ┌──────────┐    │ │  │
│  │  │    │   EC2    │  │   EC2    │  │   EC2    │    │ │  │
│  │  │    │   App    │  │   App    │  │   DB     │    │ │  │
│  │  │    └──────────┘  └──────────┘  └──────────┘    │ │  │
│  │  │         ▲                                       │ │  │
│  │  │         │ No direct access from the internet    │ │  │
│  │  │                                                  │ │  │
│  │  └─────────────────────────────────────────────────┘ │  │
│  │                                                       │  │
│  └──────────────────────────────────────────────────────┘  │
└────────────────────────────────────────────────────────────┘
Why Do You Need a Bastion Host?
1. Enhanced Security
   - Private instances are not exposed to the internet
   - Single entry point makes access control easier
   - All SSH connections can be logged

2. Minimized Attack Surface
   - Only one server has SSH port open
   - Access can be restricted by IP via security groups

3. Audit and Tracking
   - Track who connected, when, and from where
   - Integrates with CloudTrail and VPC Flow Logs
Architecture Design
Basic Architecture
┌──────────────────────────────────────────────────────────────┐
│                      VPC (10.0.0.0/16)                       │
│                                                              │
│  ┌──────────────────────┐    ┌──────────────────────┐       │
│  │   Public Subnet      │    │   Public Subnet      │       │
│  │   10.0.1.0/24 (AZ-a) │    │   10.0.2.0/24 (AZ-c) │       │
│  │                      │    │                      │       │
│  │   ┌────────────┐     │    │   ┌────────────┐     │       │
│  │   │  Bastion   │     │    │   │    NAT     │     │       │
│  │   │   Host     │     │    │   │  Gateway   │     │       │
│  │   │ (t3.micro) │     │    │   │            │     │       │
│  │   └─────┬──────┘     │    │   └─────┬──────┘     │       │
│  │         │            │    │         │            │       │
│  └─────────┼────────────┘    └─────────┼────────────┘       │
│            │                           │                     │
│            │ SSH                       │ Outbound            │
│            ▼                           ▼                     │
│  ┌──────────────────────┐    ┌──────────────────────┐       │
│  │   Private Subnet     │    │   Private Subnet     │       │
│  │   10.0.11.0/24(AZ-a) │    │   10.0.12.0/24(AZ-c) │       │
│  │                      │    │                      │       │
│  │  ┌───────┐ ┌───────┐ │    │  ┌───────┐ ┌───────┐ │       │
│  │  │ EC2   │ │ EC2   │ │    │  │ EC2   │ │ EC2   │ │       │
│  │  │ App1  │ │ App2  │ │    │  │ App3  │ │ App4  │ │       │
│  │  └───────┘ └───────┘ │    │  └───────┘ └───────┘ │       │
│  └──────────────────────┘    └──────────────────────┘       │
│                                                              │
│  Internet Gateway                                            │
│  └─── Connected to Public Subnets                            │
└──────────────────────────────────────────────────────────────┘
High Availability Architecture
In production, you should also consider Bastion Host redundancy.
┌──────────────────────────────────────────────────────────┐
│                          VPC                             │
│                                                          │
│  ┌─────────────────────┐    ┌─────────────────────┐     │
│  │   Public Subnet     │    │   Public Subnet     │     │
│  │   (AZ-a)            │    │   (AZ-c)            │     │
│  │                     │    │                     │     │
│  │  ┌───────────────┐  │    │  ┌───────────────┐  │     │
│  │  │  Bastion 1    │  │    │  │  Bastion 2    │  │     │
│  │  │  (Active)     │  │    │  │  (Standby)    │  │     │
│  │  └───────┬───────┘  │    │  └───────┬───────┘  │     │
│  └──────────┼──────────┘    └──────────┼──────────┘     │
│             │                          │                 │
│             └────────┬─────────────────┘                 │
│                      │                                   │
│              ┌───────▼───────┐                          │
│              │ Network Load  │                          │
│              │   Balancer    │                          │
│              │  (Optional)   │                          │
│              └───────────────┘                          │
│                                                          │
│  Or use an Auto Scaling Group for automatic recovery     │
└──────────────────────────────────────────────────────────┘
VPC and Network Configuration
Step 1: Create a VPC
# Create a VPC
aws ec2 create-vpc \
  --cidr-block 10.0.0.0/16 \
  --tag-specifications 'ResourceType=vpc,Tags=[{Key=Name,Value=my-vpc}]'

# Enable DNS hostnames
aws ec2 modify-vpc-attribute \
  --vpc-id vpc-xxx \
  --enable-dns-hostnames '{"Value":true}'
Step 2: Create Subnets
# Public Subnet (AZ-a) - For Bastion Host
aws ec2 create-subnet \
  --vpc-id vpc-xxx \
  --cidr-block 10.0.1.0/24 \
  --availability-zone ap-northeast-2a \
  --tag-specifications 'ResourceType=subnet,Tags=[{Key=Name,Value=public-subnet-a}]'

# Public Subnet (AZ-c) - For NAT Gateway
aws ec2 create-subnet \
  --vpc-id vpc-xxx \
  --cidr-block 10.0.2.0/24 \
  --availability-zone ap-northeast-2c \
  --tag-specifications 'ResourceType=subnet,Tags=[{Key=Name,Value=public-subnet-c}]'

# Private Subnet (AZ-a) - For App servers
aws ec2 create-subnet \
  --vpc-id vpc-xxx \
  --cidr-block 10.0.11.0/24 \
  --availability-zone ap-northeast-2a \
  --tag-specifications 'ResourceType=subnet,Tags=[{Key=Name,Value=private-subnet-a}]'

# Private Subnet (AZ-c) - For App servers
aws ec2 create-subnet \
  --vpc-id vpc-xxx \
  --cidr-block 10.0.12.0/24 \
  --availability-zone ap-northeast-2c \
  --tag-specifications 'ResourceType=subnet,Tags=[{Key=Name,Value=private-subnet-c}]'
Step 3: Set Up Internet Gateway
# Create an Internet Gateway
aws ec2 create-internet-gateway \
  --tag-specifications 'ResourceType=internet-gateway,Tags=[{Key=Name,Value=my-igw}]'

# Attach to VPC
aws ec2 attach-internet-gateway \
  --internet-gateway-id igw-xxx \
  --vpc-id vpc-xxx
Step 4: Configure Route Tables
# Create a Public Route Table
aws ec2 create-route-table \
  --vpc-id vpc-xxx \
  --tag-specifications 'ResourceType=route-table,Tags=[{Key=Name,Value=public-rt}]'

# Add route to Internet Gateway
aws ec2 create-route \
  --route-table-id rtb-public-xxx \
  --destination-cidr-block 0.0.0.0/0 \
  --gateway-id igw-xxx

# Associate Route Table with Public Subnets
aws ec2 associate-route-table \
  --route-table-id rtb-public-xxx \
  --subnet-id subnet-public-a-xxx

aws ec2 associate-route-table \
  --route-table-id rtb-public-xxx \
  --subnet-id subnet-public-c-xxx
Step 5: Set Up NAT Gateway (For Private Subnet Outbound)
The NAT Gateway is used when instances in Private Subnets need outbound internet communication.
For example, it enables package updates (dnf update), external API calls, and more.
Conversely, direct inbound access from the internet to Private instances remains blocked.
# Allocate an Elastic IP
aws ec2 allocate-address --domain vpc

# Create a NAT Gateway
aws ec2 create-nat-gateway \
  --subnet-id subnet-public-c-xxx \
  --allocation-id eipalloc-xxx \
  --tag-specifications 'ResourceType=natgateway,Tags=[{Key=Name,Value=nat-gw}]'

# Create a Private Route Table
aws ec2 create-route-table \
  --vpc-id vpc-xxx \
  --tag-specifications 'ResourceType=route-table,Tags=[{Key=Name,Value=private-rt}]'

# Add route to NAT Gateway
aws ec2 create-route \
  --route-table-id rtb-private-xxx \
  --destination-cidr-block 0.0.0.0/0 \
  --nat-gateway-id nat-xxx

# Associate Route Table with Private Subnets
aws ec2 associate-route-table \
  --route-table-id rtb-private-xxx \
  --subnet-id subnet-private-a-xxx

aws ec2 associate-route-table \
  --route-table-id rtb-private-xxx \
  --subnet-id subnet-private-c-xxx
Security Group Configuration
Security groups are the core of the Bastion architecture. Misconfiguration can lead to security vulnerabilities or make access impossible.
Bastion Host Security Group
# Create Bastion Security Group
aws ec2 create-security-group \
  --group-name bastion-sg \
  --description "Security group for Bastion Host" \
  --vpc-id vpc-xxx

# Allow SSH inbound (specific IPs only!)
aws ec2 authorize-security-group-ingress \
  --group-id sg-bastion-xxx \
  --protocol tcp \
  --port 22 \
  --cidr 203.0.113.0/32  # Change to your office/home IP

# Or allow multiple IPs
aws ec2 authorize-security-group-ingress \
  --group-id sg-bastion-xxx \
  --ip-permissions '[
    {"IpProtocol":"tcp","FromPort":22,"ToPort":22,"IpRanges":[
      {"CidrIp":"203.0.113.0/32","Description":"Office IP"},
      {"CidrIp":"198.51.100.0/32","Description":"Home IP"}
    ]}
  ]'
Private EC2 Security Group
# Create Private Instance Security Group
aws ec2 create-security-group \
  --group-name private-ec2-sg \
  --description "Security group for Private EC2 instances" \
  --vpc-id vpc-xxx

# Allow SSH only from Bastion (security group reference!)
aws ec2 authorize-security-group-ingress \
  --group-id sg-private-xxx \
  --protocol tcp \
  --port 22 \
  --source-group sg-bastion-xxx
Security Group Rules Summary
┌───────────────────────────────────────────────────────────┐
│                   Security Group Configuration             │
├───────────────────────────────────────────────────────────┤
│                                                           │
│  Bastion SG (sg-bastion):                                 │
│  ┌─────────────────────────────────────────────────────┐  │
│  │ Inbound:                                            │  │
│  │   - SSH (22) from 203.0.113.0/32 (Office IP)       │  │
│  │   - SSH (22) from 198.51.100.0/32 (Home IP)        │  │
│  │                                                     │  │
│  │ Outbound:                                           │  │
│  │   - All traffic (default)                           │  │
│  └─────────────────────────────────────────────────────┘  │
│                                                           │
│  Private EC2 SG (sg-private):                             │
│  ┌─────────────────────────────────────────────────────┐  │
│  │ Inbound:                                            │  │
│  │   - SSH (22) from sg-bastion (Bastion SG reference) │  │
│  │   - App ports from ALB SG (if needed)               │  │
│  │                                                     │  │
│  │ Outbound:                                           │  │
│  │   - All traffic (default)                           │  │
│  └─────────────────────────────────────────────────────┘  │
│                                                           │
│  Never do this:                                           │
│     - SSH (22) from 0.0.0.0/0                             │
│     - Opening all ports                                   │
│                                                           │
└───────────────────────────────────────────────────────────┘
Creating EC2 Instances
Generate SSH Key Pair
# Create a new key pair (saved locally)
aws ec2 create-key-pair \
  --key-name my-bastion-key \
  --query 'KeyMaterial' \
  --output text > ~/.ssh/my-bastion-key.pem

# Set permissions (required!)
chmod 400 ~/.ssh/my-bastion-key.pem
Create the Bastion Host
# Look up the latest Amazon Linux 2023 AMI
AMI_ID=$(aws ec2 describe-images \
  --owners amazon \
  --filters "Name=name,Values=al2023-ami-2023*-x86_64" \
            "Name=state,Values=available" \
  --query 'Images | sort_by(@, &CreationDate) | [-1].ImageId' \
  --output text)

echo "AMI ID: $AMI_ID"

# Create the Bastion Host
aws ec2 run-instances \
  --image-id $AMI_ID \
  --instance-type t3.micro \
  --key-name my-bastion-key \
  --security-group-ids sg-bastion-xxx \
  --subnet-id subnet-public-a-xxx \
  --associate-public-ip-address \
  --tag-specifications 'ResourceType=instance,Tags=[{Key=Name,Value=bastion-host}]' \
  --block-device-mappings '[{
    "DeviceName":"/dev/xvda",
    "Ebs":{
      "VolumeSize":8,
      "VolumeType":"gp3",
      "Encrypted":true
    }
  }]'
Create the Private EC2
# Create a Private instance (same key or different key)
aws ec2 run-instances \
  --image-id $AMI_ID \
  --instance-type t3.small \
  --key-name my-bastion-key \
  --security-group-ids sg-private-xxx \
  --subnet-id subnet-private-a-xxx \
  --tag-specifications 'ResourceType=instance,Tags=[{Key=Name,Value=app-server-1}]' \
  --block-device-mappings '[{
    "DeviceName":"/dev/xvda",
    "Ebs":{
      "VolumeSize":20,
      "VolumeType":"gp3",
      "Encrypted":true
    }
  }]'
Allocate Elastic IP (For Bastion)
# Allocate an Elastic IP
aws ec2 allocate-address --domain vpc

# Associate with Bastion
aws ec2 associate-address \
  --instance-id i-bastion-xxx \
  --allocation-id eipalloc-xxx

# Verify the IP
aws ec2 describe-addresses \
  --allocation-ids eipalloc-xxx \
  --query 'Addresses[0].PublicIp' \
  --output text
SSH Access Methods
Method 1: Two-Step Access (Basic)
The most basic method: first connect to the Bastion, then connect to the Private instance.
# Step 1: Connect to the Bastion
ssh -i ~/.ssh/my-bastion-key.pem ec2-user@<BASTION_PUBLIC_IP>

# Step 2: Connect from Bastion to the Private instance
ssh -i ~/.ssh/my-bastion-key.pem ec2-user@<PRIVATE_INSTANCE_IP>Problem: You need to copy the private key to the Bastion — security risk!
Method 2: SSH Agent Forwarding (Recommended)
Forwards the local SSH key through the Bastion. No need to store the key on the Bastion.
# 1. Register the key with SSH Agent
ssh-add ~/.ssh/my-bastion-key.pem

# Verify registration
ssh-add -l

# 2. Connect to Bastion with Agent Forwarding (-A option)
ssh -A -i ~/.ssh/my-bastion-key.pem ec2-user@<BASTION_PUBLIC_IP>

# 3. Connect from Bastion to Private instance (no key file needed!)
ssh ec2-user@<PRIVATE_INSTANCE_IP>
How it works:
┌──────────┐    SSH + Key    ┌──────────┐    SSH (Agent)   ┌──────────┐
│  Local   │ ──────────────► │ Bastion  │ ───────────────► │ Private  │
│ Machine  │  -A option      │          │  Local key is    │   EC2    │
│          │  forwards agent │          │  forwarded (key  │          │
│  [Key]   │                 │ [No Key] │  not stored on   │          │
└──────────┘                 └──────────┘  Bastion)        └──────────┘
Method 3: SSH ProxyJump (Most Recommended)
Connect directly to the Private instance through the Bastion with a single command.
# Single command to access the Private instance
ssh -J ec2-user@<BASTION_PUBLIC_IP> ec2-user@<PRIVATE_INSTANCE_IP> \
    -i ~/.ssh/my-bastion-key.pem
SSH Config Setup (for convenience):
# Edit the ~/.ssh/config file
cat >> ~/.ssh/config << 'EOF'

# Bastion Host
Host bastion
    HostName <BASTION_PUBLIC_IP>
    User ec2-user
    IdentityFile ~/.ssh/my-bastion-key.pem
    ForwardAgent yes

# Private Instance (via Bastion)
Host app-server-1
    HostName <PRIVATE_INSTANCE_IP>
    User ec2-user
    IdentityFile ~/.ssh/my-bastion-key.pem
    ProxyJump bastion

Host app-server-2
    HostName <PRIVATE_INSTANCE_IP_2>
    User ec2-user
    IdentityFile ~/.ssh/my-bastion-key.pem
    ProxyJump bastion

# Pattern matching for all Private instances
Host 10.0.11.* 10.0.12.*
    User ec2-user
    IdentityFile ~/.ssh/my-bastion-key.pem
    ProxyJump bastion

EOF

# Set permissions
chmod 600 ~/.ssh/configUsage:
# Now you can connect easily
ssh bastion           # Connect to Bastion
ssh app-server-1      # Connect to Private instance (automatically via Bastion)
ssh 10.0.11.45        # Connect by IP (automatically via Bastion)
Method 4: SSH ProxyCommand (Legacy)
Used with older versions of SSH that do not support ProxyJump.
# ~/.ssh/config
Host app-server-1
    HostName <PRIVATE_INSTANCE_IP>
    User ec2-user
    IdentityFile ~/.ssh/my-bastion-key.pem
    ProxyCommand ssh -W %h:%p -i ~/.ssh/my-bastion-key.pem ec2-user@<BASTION_PUBLIC_IP>
File Transfer (SCP/SFTP)
File transfer with SCP:
# Local -> Private instance (via Bastion)
scp -J ec2-user@<BASTION_IP> \
    ./local-file.txt \
    ec2-user@<PRIVATE_IP>:/home/ec2-user/

# With SSH Config configured
scp ./local-file.txt app-server-1:/home/ec2-user/

# Private instance -> Local
scp app-server-1:/var/log/app.log ./
Using SFTP:
# With SSH Config configured
sftp app-server-1
Session Manager Alternative (Recommended)
AWS Systems Manager Session Manager allows you to access EC2 without SSH. No Bastion Host is needed, and security is further enhanced.
Session Manager Advantages
1. No SSH port (22) required
   -> SSH inbound rules can be removed from security groups

2. No SSH key management needed
   -> Access control via IAM

3. All sessions logged in CloudTrail
   -> Track who ran what commands, when

4. Direct access to Private instances
   -> No Bastion Host needed (cost savings)

5. Access via web console is also possible
Session Manager Setup
1. Create an IAM Role (for EC2):
# Role with SSM managed policy
aws iam create-role \
  --role-name EC2-SSM-Role \
  --assume-role-policy-document '{
    "Version": "2012-10-17",
    "Statement": [{
      "Effect": "Allow",
      "Principal": {"Service": "ec2.amazonaws.com"},
      "Action": "sts:AssumeRole"
    }]
  }'

# Attach SSM policy
aws iam attach-role-policy \
  --role-name EC2-SSM-Role \
  --policy-arn arn:aws:iam::aws:policy/AmazonSSMManagedInstanceCore

# Create instance profile
aws iam create-instance-profile \
  --instance-profile-name EC2-SSM-Profile

aws iam add-role-to-instance-profile \
  --instance-profile-name EC2-SSM-Profile \
  --role-name EC2-SSM-Role
2. Attach the role to EC2:
# Attach to an existing instance
aws ec2 associate-iam-instance-profile \
  --instance-id i-xxx \
  --iam-instance-profile Name=EC2-SSM-Profile
3. Create VPC Endpoints (for Private Subnets):
# SSM Endpoint
aws ec2 create-vpc-endpoint \
  --vpc-id vpc-xxx \
  --service-name com.amazonaws.ap-northeast-2.ssm \
  --vpc-endpoint-type Interface \
  --subnet-ids subnet-private-a-xxx subnet-private-c-xxx \
  --security-group-ids sg-endpoint-xxx

# SSM Messages Endpoint
aws ec2 create-vpc-endpoint \
  --vpc-id vpc-xxx \
  --service-name com.amazonaws.ap-northeast-2.ssmmessages \
  --vpc-endpoint-type Interface \
  --subnet-ids subnet-private-a-xxx subnet-private-c-xxx \
  --security-group-ids sg-endpoint-xxx

# EC2 Messages Endpoint
aws ec2 create-vpc-endpoint \
  --vpc-id vpc-xxx \
  --service-name com.amazonaws.ap-northeast-2.ec2messages \
  --vpc-endpoint-type Interface \
  --subnet-ids subnet-private-a-xxx subnet-private-c-xxx \
  --security-group-ids sg-endpoint-xxx
4. Connect via Session Manager:
# Connect using AWS CLI
aws ssm start-session --target i-xxx

# SSH over Session Manager (use local SSH commands)
# Add to ~/.ssh/config
Host i-*
    ProxyCommand sh -c "aws ssm start-session --target %h --document-name AWS-StartSSHSession --parameters 'portNumber=%p'"
    User ec2-user
    IdentityFile ~/.ssh/my-key.pem

# Then use it like regular SSH
ssh i-xxx
Bastion vs Session Manager Comparison
| Category | Bastion Host | Session Manager |
|---|---|---|
| SSH Port | Required (22) | Not required |
| Authentication | SSH Key | IAM |
| Cost | EC2 cost | VPC Endpoint cost |
| Logging | Manual setup | Automatic (CloudTrail) |
| File Transfer | SCP/SFTP | S3 or Port Forwarding |
| Setup Complexity | Low | Medium |
Security Hardening
1. Change the SSH Port
Use a port other than the default port 22.
# Change SSH configuration on the Bastion
sudo vi /etc/ssh/sshd_config

# Change Port
Port 2222

# Restart the service
sudo systemctl restart sshd
Update the security group as well:
# Remove existing port 22
aws ec2 revoke-security-group-ingress \
  --group-id sg-bastion-xxx \
  --protocol tcp \
  --port 22 \
  --cidr 203.0.113.0/32

# Add new port
aws ec2 authorize-security-group-ingress \
  --group-id sg-bastion-xxx \
  --protocol tcp \
  --port 2222 \
  --cidr 203.0.113.0/32
2. Install Fail2ban
Block SSH brute-force attacks.
# Install
sudo dnf install -y fail2ban

# Configure
sudo cat > /etc/fail2ban/jail.local << 'EOF'
[sshd]
enabled = true
port = ssh
filter = sshd
logpath = /var/log/secure
maxretry = 3
bantime = 3600
findtime = 600
EOF

# Start
sudo systemctl enable fail2ban
sudo systemctl start fail2ban

# Check status
sudo fail2ban-client status sshd
3. Harden SSH Configuration
# Edit /etc/ssh/sshd_config
sudo vi /etc/ssh/sshd_config
# Recommended settings
PermitRootLogin no # Disable root login
PasswordAuthentication no # Disable password authentication (key only)
PubkeyAuthentication yes # Enable public key authentication
MaxAuthTries 3 # Maximum authentication attempts
ClientAliveInterval 300 # Idle timeout (5 minutes)
ClientAliveCountMax 2 # Disconnect after timeout
AllowUsers ec2-user # Allow only specific users# Apply settings
sudo systemctl restart sshd4. Restrict Access by IP
# Allow only specific IPs in security groups
# Ideally, allow only company VPN IP

aws ec2 authorize-security-group-ingress \
  --group-id sg-bastion-xxx \
  --protocol tcp \
  --port 22 \
  --cidr 10.20.30.0/24  # Company VPN CIDR
5. Apply MFA (Google Authenticator)
# Install Google Authenticator
sudo dnf install -y google-authenticator

# Configure per user
google-authenticator

# PAM configuration
sudo vi /etc/pam.d/sshd
# Add the following line:
# auth required pam_google_authenticator.so

# SSH configuration
sudo vi /etc/ssh/sshd_config
# Change:
# ChallengeResponseAuthentication yes
# AuthenticationMethods publickey,keyboard-interactive

sudo systemctl restart sshd
6. CloudWatch Log Collection
# Install CloudWatch Agent
sudo dnf install -y amazon-cloudwatch-agent

# Create configuration file
sudo cat > /opt/aws/amazon-cloudwatch-agent/etc/amazon-cloudwatch-agent.json << 'EOF'
{
  "logs": {
    "logs_collected": {
      "files": {
        "collect_list": [
          {
            "file_path": "/var/log/secure",
            "log_group_name": "/bastion/ssh",
            "log_stream_name": "{instance_id}"
          }
        ]
      }
    }
  }
}
EOF

# Start the agent
sudo /opt/aws/amazon-cloudwatch-agent/bin/amazon-cloudwatch-agent-ctl \
  -a fetch-config \
  -m ec2 \
  -s \
  -c file:/opt/aws/amazon-cloudwatch-agent/etc/amazon-cloudwatch-agent.json
Automation (Terraform)
Codify the entire Bastion infrastructure using Terraform.
# main.tf

# VPC
resource "aws_vpc" "main" {
  cidr_block           = "10.0.0.0/16"
  enable_dns_hostnames = true
  enable_dns_support   = true

  tags = {
    Name = "main-vpc"
  }
}

# Public Subnet
resource "aws_subnet" "public" {
  vpc_id                  = aws_vpc.main.id
  cidr_block              = "10.0.1.0/24"
  availability_zone       = "ap-northeast-2a"
  map_public_ip_on_launch = true

  tags = {
    Name = "public-subnet"
  }
}

# Private Subnet
resource "aws_subnet" "private" {
  vpc_id            = aws_vpc.main.id
  cidr_block        = "10.0.11.0/24"
  availability_zone = "ap-northeast-2a"

  tags = {
    Name = "private-subnet"
  }
}

# Internet Gateway
resource "aws_internet_gateway" "main" {
  vpc_id = aws_vpc.main.id

  tags = {
    Name = "main-igw"
  }
}

# Public Route Table
resource "aws_route_table" "public" {
  vpc_id = aws_vpc.main.id

  route {
    cidr_block = "0.0.0.0/0"
    gateway_id = aws_internet_gateway.main.id
  }

  tags = {
    Name = "public-rt"
  }
}

resource "aws_route_table_association" "public" {
  subnet_id      = aws_subnet.public.id
  route_table_id = aws_route_table.public.id
}

# Bastion Security Group
resource "aws_security_group" "bastion" {
  name        = "bastion-sg"
  description = "Security group for Bastion Host"
  vpc_id      = aws_vpc.main.id

  ingress {
    description = "SSH from allowed IPs"
    from_port   = 22
    to_port     = 22
    protocol    = "tcp"
    cidr_blocks = var.allowed_ssh_cidr_blocks
  }

  egress {
    from_port   = 0
    to_port     = 0
    protocol    = "-1"
    cidr_blocks = ["0.0.0.0/0"]
  }

  tags = {
    Name = "bastion-sg"
  }
}

# Private EC2 Security Group
resource "aws_security_group" "private" {
  name        = "private-ec2-sg"
  description = "Security group for Private EC2"
  vpc_id      = aws_vpc.main.id

  ingress {
    description     = "SSH from Bastion"
    from_port       = 22
    to_port         = 22
    protocol        = "tcp"
    security_groups = [aws_security_group.bastion.id]
  }

  egress {
    from_port   = 0
    to_port     = 0
    protocol    = "-1"
    cidr_blocks = ["0.0.0.0/0"]
  }

  tags = {
    Name = "private-ec2-sg"
  }
}

# Key Pair
resource "aws_key_pair" "bastion" {
  key_name   = "bastion-key"
  public_key = file(var.public_key_path)
}

# Bastion Host
resource "aws_instance" "bastion" {
  ami                    = data.aws_ami.amazon_linux_2023.id
  instance_type          = "t3.micro"
  key_name               = aws_key_pair.bastion.key_name
  subnet_id              = aws_subnet.public.id
  vpc_security_group_ids = [aws_security_group.bastion.id]

  root_block_device {
    volume_size = 8
    volume_type = "gp3"
    encrypted   = true
  }

  tags = {
    Name = "bastion-host"
  }
}

# Elastic IP for Bastion
resource "aws_eip" "bastion" {
  instance = aws_instance.bastion.id
  domain   = "vpc"

  tags = {
    Name = "bastion-eip"
  }
}

# Private EC2
resource "aws_instance" "app" {
  ami                    = data.aws_ami.amazon_linux_2023.id
  instance_type          = "t3.small"
  key_name               = aws_key_pair.bastion.key_name
  subnet_id              = aws_subnet.private.id
  vpc_security_group_ids = [aws_security_group.private.id]

  root_block_device {
    volume_size = 20
    volume_type = "gp3"
    encrypted   = true
  }

  tags = {
    Name = "app-server"
  }
}

# Latest Amazon Linux 2023 AMI
data "aws_ami" "amazon_linux_2023" {
  most_recent = true
  owners      = ["amazon"]

  filter {
    name   = "name"
    values = ["al2023-ami-2023*-x86_64"]
  }

  filter {
    name   = "state"
    values = ["available"]
  }
}

# Variables
variable "allowed_ssh_cidr_blocks" {
  description = "CIDR blocks allowed to SSH to Bastion"
  type        = list(string)
  default     = ["0.0.0.0/0"]  # Change to specific IPs in production!
}

variable "public_key_path" {
  description = "Path to public key file"
  type        = string
  default     = "~/.ssh/id_rsa.pub"
}

# Outputs
output "bastion_public_ip" {
  value = aws_eip.bastion.public_ip
}

output "private_instance_ip" {
  value = aws_instance.app.private_ip
}

output "ssh_command" {
  value = "ssh -J ec2-user@${aws_eip.bastion.public_ip} ec2-user@${aws_instance.app.private_ip}"
}Usage:
# Initialize
terraform init

# Review the plan
terraform plan -var="allowed_ssh_cidr_blocks=[\"203.0.113.0/32\"]"

# Apply
terraform apply -var="allowed_ssh_cidr_blocks=[\"203.0.113.0/32\"]"

# Connect using the output SSH command
# ssh -J ec2-user@<BASTION_IP> ec2-user@<PRIVATE_IP>
Troubleshooting
Cannot Connect via SSH
# 1. Check security groups
aws ec2 describe-security-groups --group-ids sg-bastion-xxx

# Checklist:
# - Does SSH (22) inbound allow my IP?
# - Check my current IP: curl ifconfig.me

# 2. Check instance status
aws ec2 describe-instance-status --instance-ids i-xxx

# 3. Check Network ACLs
aws ec2 describe-network-acls --filters "Name=vpc-id,Values=vpc-xxx"

# 4. Check route tables
aws ec2 describe-route-tables --filters "Name=vpc-id,Values=vpc-xxx"

# 5. Debug with SSH verbose mode
ssh -vvv -i ~/.ssh/key.pem ec2-user@<IP>
Bastion Works but Private Instance Does Not
# 1. Check Private instance security group
# - Is SSH from Bastion SG allowed?

# 2. Test connectivity from Bastion to Private IP
# After connecting to Bastion:
ping <PRIVATE_IP>
nc -zv <PRIVATE_IP> 22

# 3. Verify SSH Agent Forwarding
ssh-add -l  # Check if the key is registered
ssh -A ...  # Ensure -A option is used
Permission denied (publickey)
# 1. Check key file permissions
ls -la ~/.ssh/my-key.pem
# Should be -r-------- (400)

# 2. Verify the correct username
# Amazon Linux: ec2-user
# Ubuntu: ubuntu
# RHEL: ec2-user or root

# 3. Check key pair
aws ec2 describe-key-pairs --key-names my-key

# 4. Check the instance's key pair
aws ec2 describe-instances --instance-ids i-xxx \
  --query 'Reservations[0].Instances[0].KeyName'
Connection timed out
# 1. Check if the instance is running
aws ec2 describe-instances --instance-ids i-xxx \
  --query 'Reservations[0].Instances[0].State.Name'

# 2. Check the public IP (Bastion)
aws ec2 describe-instances --instance-ids i-xxx \
  --query 'Reservations[0].Instances[0].PublicIpAddress'

# 3. Verify Internet Gateway attachment
aws ec2 describe-internet-gateways \
  --filters "Name=attachment.vpc-id,Values=vpc-xxx"

# 4. Check route table for IGW route
aws ec2 describe-route-tables --route-table-ids rtb-xxx
Checklist
Before Setup
- VPC CIDR design complete
- Public/Private subnet design complete
- SSH key pair generated
- List of allowed access IPs obtained
During Setup
- VPC, subnets, and IGW created
- NAT Gateway created (for Private outbound)
- Route tables configured
- Bastion security group (SSH only, specific IPs)
- Private security group (Bastion SG reference)
- Bastion Host created
- Elastic IP associated
- SSH connection tested
Security Hardening
- SSH port changed (optional)
- Fail2ban installed
- SSH configuration hardened (root login disabled, etc.)
- CloudWatch log collection configured
- MFA applied (optional)
Operations
- Regular security patches
- Access log monitoring
- Cleanup of unnecessary users
- Evaluate transition to Session Manager
Secure Web Service Access via ALB
SSH access goes through the Bastion, while HTTP/HTTPS web service access is configured through an ALB (Application Load Balancer). This way, EC2 instances in Private Subnets can serve web traffic without being directly exposed to the internet.
ALB Architecture
┌───────────────────────────────────────────────────────────────┐
│                          Internet                             │
│                             │                                 │
│                             ▼                                 │
│  ┌─────────────────────────────────────────────────────────┐  │
│  │                         VPC                              │  │
│  │                                                          │  │
│  │  ┌────────────────────────────────────────────────────┐  │  │
│  │  │                  Public Subnet                      │  │  │
│  │  │                                                     │  │  │
│  │  │   ┌───────────────────────────────────────────┐    │  │  │
│  │  │   │       Application Load Balancer           │    │  │  │
│  │  │   │                 (ALB)                     │    │  │  │
│  │  │   │                                           │    │  │  │
│  │  │   │   HTTPS (443) <-- Accessible from internet│    │  │  │
│  │  │   │   - SSL termination                       │    │  │  │
│  │  │   │   - WAF integration available             │    │  │  │
│  │  │   │   - Path-based routing                    │    │  │  │
│  │  │   └──────────────────┬────────────────────────┘    │  │  │
│  │  │                      │                              │  │  │
│  │  └──────────────────────┼──────────────────────────────┘  │  │
│  │                         │ HTTP (8080)                     │  │
│  │                         ▼                                 │  │
│  │  ┌────────────────────────────────────────────────────┐  │  │
│  │  │                  Private Subnet                     │  │  │
│  │  │                                                     │  │  │
│  │  │   ┌──────────┐   ┌──────────┐   ┌──────────┐       │  │  │
│  │  │   │   EC2    │   │   EC2    │   │   EC2    │       │  │  │
│  │  │   │  App 1   │   │  App 2   │   │  App 3   │       │  │  │
│  │  │   │ (8080)   │   │ (8080)   │   │ (8080)   │       │  │  │
│  │  │   └──────────┘   └──────────┘   └──────────┘       │  │  │
│  │  │        ▲                                            │  │  │
│  │  │        │ Accessible only from ALB                   │  │  │
│  │  │        │ No direct internet access                  │  │  │
│  │  │                                                     │  │  │
│  │  └────────────────────────────────────────────────────┘  │  │
│  └─────────────────────────────────────────────────────────┘  │
└───────────────────────────────────────────────────────────────┘
ALB Security Group Configuration
# Create ALB Security Group
aws ec2 create-security-group \
  --group-name alb-sg \
  --description "Security group for Application Load Balancer" \
  --vpc-id vpc-xxx

# Allow HTTPS inbound (from all)
aws ec2 authorize-security-group-ingress \
  --group-id sg-alb-xxx \
  --protocol tcp \
  --port 443 \
  --cidr 0.0.0.0/0

# Allow HTTP inbound (for HTTPS redirect)
aws ec2 authorize-security-group-ingress \
  --group-id sg-alb-xxx \
  --protocol tcp \
  --port 80 \
  --cidr 0.0.0.0/0
Private EC2 Security Group (For ALB)
# Allow traffic from ALB in Private EC2 security group
aws ec2 authorize-security-group-ingress \
  --group-id sg-private-xxx \
  --protocol tcp \
  --port 8080 \
  --source-group sg-alb-xxx

# Keep existing Bastion SSH as well
# - SSH (22) from sg-bastion-xxx (already configured)
Complete Security Group Design
┌───────────────────────────────────────────────────────────────┐
│                    Security Group Design                       │
├───────────────────────────────────────────────────────────────┤
│                                                               │
│  ALB SG (sg-alb):                                             │
│  ┌─────────────────────────────────────────────────────────┐  │
│  │ Inbound:                                                │  │
│  │   - HTTPS (443) from 0.0.0.0/0                          │  │
│  │   - HTTP (80) from 0.0.0.0/0 (for redirect)             │  │
│  │                                                         │  │
│  │ Outbound:                                               │  │
│  │   - All traffic                                         │  │
│  └─────────────────────────────────────────────────────────┘  │
│                             │                                  │
│                             ▼                                  │
│  Private EC2 SG (sg-private):                                  │
│  ┌─────────────────────────────────────────────────────────┐  │
│  │ Inbound:                                                │  │
│  │   - HTTP (8080) from sg-alb (from ALB only!)            │  │
│  │   - SSH (22) from sg-bastion (from Bastion only!)       │  │
│  │                                                         │  │
│  │ Outbound:                                               │  │
│  │   - All traffic                                         │  │
│  └─────────────────────────────────────────────────────────┘  │
│                                                               │
│  Advantages:                                                  │
│     - EC2 is not directly exposed to the internet             │
│     - SSL termination at ALB -> EC2 handles HTTP only         │
│     - Access control through security group chaining          │
│                                                               │
└───────────────────────────────────────────────────────────────┘
Create the ALB
# 1. Create Target Group
aws elbv2 create-target-group \
  --name my-app-tg \
  --protocol HTTP \
  --port 8080 \
  --vpc-id vpc-xxx \
  --target-type instance \
  --health-check-path /health \
  --health-check-interval-seconds 30 \
  --healthy-threshold-count 2 \
  --unhealthy-threshold-count 3

# 2. Register EC2 instances in the Target Group
aws elbv2 register-targets \
  --target-group-arn arn:aws:elasticloadbalancing:ap-northeast-2:xxx:targetgroup/my-app-tg/xxx \
  --targets Id=i-app1-xxx Id=i-app2-xxx Id=i-app3-xxx

# 3. Create the ALB
aws elbv2 create-load-balancer \
  --name my-app-alb \
  --subnets subnet-public-a-xxx subnet-public-c-xxx \
  --security-groups sg-alb-xxx \
  --scheme internet-facing \
  --type application \
  --ip-address-type ipv4

# 4. HTTP Listener (HTTPS redirect)
aws elbv2 create-listener \
  --load-balancer-arn arn:aws:elasticloadbalancing:ap-northeast-2:xxx:loadbalancer/app/my-app-alb/xxx \
  --protocol HTTP \
  --port 80 \
  --default-actions '[{
    "Type": "redirect",
    "RedirectConfig": {
      "Protocol": "HTTPS",
      "Port": "443",
      "StatusCode": "HTTP_301"
    }
  }]'

# 5. HTTPS Listener (SSL certificate required)
aws elbv2 create-listener \
  --load-balancer-arn arn:aws:elasticloadbalancing:ap-northeast-2:xxx:loadbalancer/app/my-app-alb/xxx \
  --protocol HTTPS \
  --port 443 \
  --ssl-policy ELBSecurityPolicy-TLS13-1-2-2021-06 \
  --certificates CertificateArn=arn:aws:acm:ap-northeast-2:xxx:certificate/xxx \
  --default-actions '[{
    "Type": "forward",
    "TargetGroupArn": "arn:aws:elasticloadbalancing:ap-northeast-2:xxx:targetgroup/my-app-tg/xxx"
  }]'
SSL Certificate Setup (ACM)
# Request a certificate from ACM
aws acm request-certificate \
  --domain-name "*.example.com" \
  --validation-method DNS \
  --subject-alternative-names "example.com"

# Check DNS validation records
aws acm describe-certificate \
  --certificate-arn arn:aws:acm:ap-northeast-2:xxx:certificate/xxx \
  --query 'Certificate.DomainValidationOptions'

# Certificate is issued after adding DNS validation records to Route 53
Path-Based Routing
Route multiple services through a single ALB.
# Create Target Groups for each service
# - /api/* -> API server
# - /admin/* -> Admin server
# - /* -> Web server

# API Target Group
aws elbv2 create-target-group \
  --name api-tg \
  --protocol HTTP \
  --port 8080 \
  --vpc-id vpc-xxx

# Admin Target Group
aws elbv2 create-target-group \
  --name admin-tg \
  --protocol HTTP \
  --port 8080 \
  --vpc-id vpc-xxx

# Add listener rules
aws elbv2 create-rule \
  --listener-arn arn:aws:elasticloadbalancing:...:listener/app/my-alb/.../... \
  --priority 10 \
  --conditions '[{
    "Field": "path-pattern",
    "Values": ["/api/*"]
  }]' \
  --actions '[{
    "Type": "forward",
    "TargetGroupArn": "arn:aws:elasticloadbalancing:...:targetgroup/api-tg/..."
  }]'

aws elbv2 create-rule \
  --listener-arn arn:aws:elasticloadbalancing:...:listener/app/my-alb/.../... \
  --priority 20 \
  --conditions '[{
    "Field": "path-pattern",
    "Values": ["/admin/*"]
  }]' \
  --actions '[{
    "Type": "forward",
    "TargetGroupArn": "arn:aws:elasticloadbalancing:...:targetgroup/admin-tg/..."
  }]'
Host-Based Routing
Handle multiple domains through a single ALB.
# api.example.com -> API server
aws elbv2 create-rule \
  --listener-arn arn:aws:elasticloadbalancing:...:listener/... \
  --priority 5 \
  --conditions '[{
    "Field": "host-header",
    "Values": ["api.example.com"]
  }]' \
  --actions '[{
    "Type": "forward",
    "TargetGroupArn": "arn:aws:elasticloadbalancing:...:targetgroup/api-tg/..."
  }]'

# admin.example.com -> Admin server
aws elbv2 create-rule \
  --listener-arn arn:aws:elasticloadbalancing:...:listener/... \
  --priority 6 \
  --conditions '[{
    "Field": "host-header",
    "Values": ["admin.example.com"]
  }]' \
  --actions '[{
    "Type": "forward",
    "TargetGroupArn": "arn:aws:elasticloadbalancing:...:targetgroup/admin-tg/..."
  }]'
ALB + Auto Scaling Integration
# Connect Target Group when creating Auto Scaling Group
aws autoscaling create-auto-scaling-group \
  --auto-scaling-group-name my-app-asg \
  --launch-template LaunchTemplateId=lt-xxx,Version='$Latest' \
  --min-size 2 \
  --max-size 10 \
  --desired-capacity 3 \
  --vpc-zone-identifier "subnet-private-a-xxx,subnet-private-c-xxx" \
  --target-group-arns "arn:aws:elasticloadbalancing:...:targetgroup/my-app-tg/..." \
  --health-check-type ELB \
  --health-check-grace-period 300
ALB Security Hardening
1. WAF (Web Application Firewall) Integration:
# Associate WAF Web ACL with ALB
aws wafv2 associate-web-acl \
  --web-acl-arn arn:aws:wafv2:ap-northeast-2:xxx:regional/webacl/my-waf/xxx \
  --resource-arn arn:aws:elasticloadbalancing:ap-northeast-2:xxx:loadbalancer/app/my-alb/xxx
2. Enable Access Logs:
# Store ALB logs in S3 bucket
aws elbv2 modify-load-balancer-attributes \
  --load-balancer-arn arn:aws:elasticloadbalancing:...:loadbalancer/app/my-alb/... \
  --attributes '[
    {"Key":"access_logs.s3.enabled","Value":"true"},
    {"Key":"access_logs.s3.bucket","Value":"my-alb-logs-bucket"},
    {"Key":"access_logs.s3.prefix","Value":"alb-logs"}
  ]'
3. Use Latest TLS Policy:
# TLS 1.3 support policy
--ssl-policy ELBSecurityPolicy-TLS13-1-2-2021-06
ALB Cost Optimization
ALB Cost Structure:
1. Hourly rate: ~$0.0225/hour
2. LCU (Load Balancer Capacity Units): based on usage

LCU Calculation Factors:
- New connections per second
- Active connections
- Processed bytes
- Rule evaluations

Cost Saving Tips:
- Consider NLB or direct instance access instead of ALB for dev environments
- Clean up unnecessary listener rules
- Delete idle ALBs
Overall Architecture Summary
┌───────────────────────────────────────────────────────────────┐
│                    Overall Access Architecture                  │
├───────────────────────────────────────────────────────────────┤
│                                                               │
│  Web Service Access (HTTP/HTTPS):                             │
│  ┌─────────────────────────────────────────────────────────┐  │
│  │  User -> ALB (443) -> Private EC2 (8080)                │  │
│  │                                                         │  │
│  │  - SSL termination: handled at ALB                      │  │
│  │  - Attack blocking with WAF                             │  │
│  │  - Scaling with Auto Scaling                            │  │
│  └─────────────────────────────────────────────────────────┘  │
│                                                               │
│  Server Management Access (SSH):                              │
│  ┌─────────────────────────────────────────────────────────┐  │
│  │  Admin -> Bastion (22) -> Private EC2 (22)              │  │
│  │                                                         │  │
│  │  - SSH Agent Forwarding                                 │  │
│  │  - Specific IPs only                                    │  │
│  │  - Or use Session Manager                               │  │
│  └─────────────────────────────────────────────────────────┘  │
│                                                               │
│  Security Principles:                                         │
│  - Private EC2 is not directly exposed to the internet        │
│  - All access goes through ALB or Bastion only                │
│  - Least privilege applied via security group chaining        │
│                                                               │
└───────────────────────────────────────────────────────────────┘
Conclusion
The method for securely accessing EC2 instances in Private Subnets depends on the use case.
SSH management access -> Bastion Host or Session Manager Web service access -> ALB
Key Points:
- Network Design: Place app EC2 instances in Private Subnets; ALB/Bastion in Public Subnets
- Security Group Chaining: Allow EC2 access only from ALB SG and Bastion SG
- SSH Management: Use Agent Forwarding/ProxyJump so keys are never stored on the Bastion
- Web Services: SSL termination at ALB, attack blocking with WAF
- Session Manager: IAM-based access without SSH ports (Bastion alternative)
- Security Hardening: Logging, MFA, Fail2ban, IP access restrictions