Building a Local GitOps Pipeline with ArgoCD on kind
Introduction
In Part 1, we set up a multi-node cluster with kind
and manually deployed a Spring Boot app (marketplace).
The process involved building an image, loading it with kind load, writing Deployment YAML, and running kubectl apply.
It worked, but the problem is repeating this process every time.
Changing image tags, editing YAML files, and running kubectl apply again whenever code changes is inefficient.
It is also error-prone — forgetting to update a tag or deploying to the wrong environment.
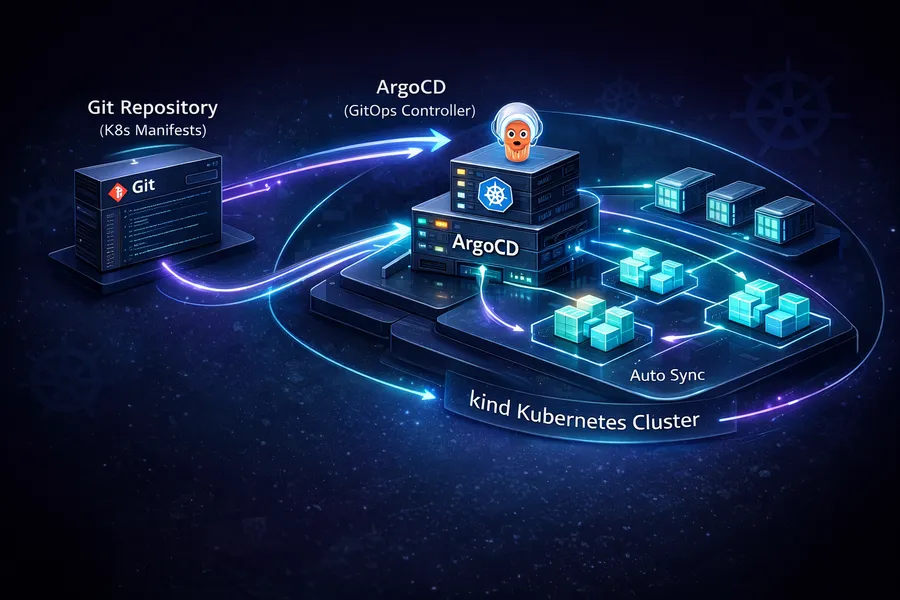
In this post, we install ArgoCD and build a GitOps pipeline where a Git push automatically triggers deployment. Deployment configurations are managed declaratively in a Git repository, and ArgoCD watches that repository and automatically applies changes to the cluster.
This is the second post in the Local K8s Practice series.
- Part 1: Setting Up a Local K8s Cluster with kind
- This post: Building a Local GitOps Pipeline with ArgoCD on kind
- Part 3: K8s Log Monitoring with Loki + Grafana
What is GitOps
GitOps is simple. Git is the Single Source of Truth for deployments.
The difference from traditional deployment becomes clear in comparison:
| Aspect | Traditional | GitOps |
|---|---|---|
| Deployment trigger | Someone runs kubectl apply | Git push triggers auto-detection |
| State management | Applied directly to the cluster. No record anywhere | All state declared in Git |
| Rollback | Must remember the previous YAML | Just git revert |
| Audit | No way to know who changed what and when | Full traceability via Git commit history |
There are three core principles:
- Declarative definition: Declare the desired cluster state in YAML
- Git = truth: The state in Git is the desired state of the cluster
- Automatic sync: If Git and the cluster state differ, reconcile automatically
ArgoCD is a tool that implements these GitOps principles. It periodically polls the Git repository and automatically applies changes to the cluster when it detects them. Flux is a similar tool, but ArgoCD has an intuitive web UI that makes it easy to visually inspect the state.
Installing ArgoCD
We use Helm for the installation.
You can also install with kubectl apply, but Helm makes upgrades and removal easier.
Adding the Helm Chart Repo
helm repo add argo https://argoproj.github.io/argo-helm
helm repo update
Installing ArgoCD
helm install argocd argo/argo-cd -n argocd --create-namespaceThe --create-namespace flag automatically creates the argocd namespace.
Once installed, check the Pod status:
kubectl get pods -n argocdNAME READY STATUS RESTARTS AGE
argocd-application-controller-0 1/1 Running 0 60s
argocd-applicationset-controller-xxxxxxxxxx-xxxxx 1/1 Running 0 60s
argocd-dex-server-xxxxxxxxxx-xxxxx 1/1 Running 0 60s
argocd-notifications-controller-xxxxxxxxxx-xxxxx 1/1 Running 0 60s
argocd-redis-xxxxxxxxxx-xxxxx 1/1 Running 0 60s
argocd-repo-server-xxxxxxxxxx-xxxxx 1/1 Running 0 60s
argocd-server-xxxxxxxxxx-xxxxx 1/1 Running 0 60sAll 7 Pods should be in Running status.
Here is a quick summary of each component:
| Component | Role |
|---|---|
| application-controller | Core component that compares Git and cluster state, then syncs |
| repo-server | Clones/pulls Git repos and renders Helm/Kustomize manifests |
| server | Web UI and API server |
| dex-server | SSO authentication (GitHub, LDAP, and other external identity providers) |
| redis | Caching layer |
| notifications-controller | Manages notifications to Slack, email, etc. |
| applicationset-controller | Manages ApplicationSets (template-based multi-app management) |
Accessing the Web UI
To access the ArgoCD server, you need port forwarding:
kubectl port-forward svc/argocd-server -n argocd 8080:443Now open https://localhost:8080 in your browser. You will see a browser warning because of the self-signed certificate — ignore it and proceed.
Getting the Initial Password
ArgoCD stores the admin account’s initial password in a Secret at install time. Retrieve it with:
kubectl -n argocd get secret argocd-initial-admin-secret -o jsonpath="{.data.password}" | base64 -dThe output string is the password. Login credentials:
- Username:
admin - Password: the string from the command above
After logging in, you will see the ArgoCD dashboard. Since no Application has been registered yet, it will be an empty screen.
Tip: To change the password, install the ArgoCD CLI and run
argocd account update-password. For local practice, the initial password is fine as-is.
Setting Up the marketplace-deploy Project
One important GitOps pattern is separating the app code repository from the deployment config repository.
marketplace/              <-- App source code (Spring Boot)
marketplace-deploy/       <-- Deployment config (Helm chart, values)
Why separate them?
- Separation of concerns: Developers focus on app code; deployment config is managed independently
- Deployment history isolation: App code commits and deployment config changes do not mix
- Access control: In production, you can manage access to the deployment repo separately
- Clear ArgoCD watch target: ArgoCD only watches the deploy repo. App code changes go through CI, which builds the image and updates the tag in the deploy repo
Project Structure
The marketplace-deploy repository (https://github.com/rhcwlq89/marketplace-deploy.git) has this structure:
marketplace-deploy/
└── helm/
    └── marketplace/
        ├── Chart.yaml
        ├── values.yaml
        └── templates/
            ├── deployment.yaml
            ├── service.yaml
            └── ingress.yaml
A single Helm chart manages the Deployment, Service, and Ingress. Let us walk through each file.
Chart.yaml
apiVersion: v2
name: marketplace
description: Marketplace Spring Boot application
type: application
version: 0.1.0
appVersion: "v1"| Field | Description |
|---|---|
apiVersion: v2 | Helm 3 chart format |
name | Chart name. Used in resource names |
type: application | Deployable chart. library type is for shared templates |
version | The chart’s own version |
appVersion | The version of the app being deployed. Keeping this in sync with the image tag simplifies management |
values.yaml
replicaCount: 2

image:
  repository: marketplace
  tag: v2
  pullPolicy: Never  # Loaded directly via kind load

service:
  type: ClusterIP
  port: 8080

ingress:
  enabled: true
  host: marketplace.local

resources:
  requests:
    cpu: 200m
    memory: 256Mi
  limits:
    cpu: 500m
    memory: 512Mi

env:
  SPRING_PROFILES_ACTIVE: local
Here is what each value means:
| Value | Description |
|---|---|
replicaCount: 2 | Runs 2 Pods. With 2 worker nodes, one Pod lands on each |
image.pullPolicy: Never | Uses images loaded via kind load, so it does not pull from a registry |
service.type: ClusterIP | Accessible only within the cluster. Exposed externally through Ingress |
resources.requests | Minimum guaranteed resources for Pod scheduling. The scheduler uses this to select a node |
resources.limits | Maximum resources a Pod can use. Exceeding causes OOMKilled (memory) or throttling (CPU) |
env | Sets the Spring Boot profile to local |
The difference between requests and limits is important.
requests means “I need at least this much,” and limits means “I cannot use more than this.”
Setting only requests allows unlimited resource usage.
Setting only limits auto-sets requests to the same value.
Setting both is the safest approach.
deployment.yaml
apiVersion: apps/v1
kind: Deployment
metadata:
  name: {{ .Chart.Name }}
  labels:
    app: {{ .Chart.Name }}
spec:
  replicas: {{ .Values.replicaCount }}
  selector:
    matchLabels:
      app: {{ .Chart.Name }}
  template:
    metadata:
      labels:
        app: {{ .Chart.Name }}
    spec:
      containers:
        - name: {{ .Chart.Name }}
          image: "{{ .Values.image.repository }}:{{ .Values.image.tag }}"
          imagePullPolicy: {{ .Values.image.pullPolicy }}
          ports:
            - containerPort: 8080
          env:
            {{- range $key, $value := .Values.env }}
            - name: {{ $key }}
              value: "{{ $value }}"
            {{- end }}
          resources:
            requests:
              cpu: {{ .Values.resources.requests.cpu }}
              memory: {{ .Values.resources.requests.memory }}
            limits:
              cpu: {{ .Values.resources.limits.cpu }}
              memory: {{ .Values.resources.limits.memory }}
          readinessProbe:
            httpGet:
              path: /actuator/health
              port: 8080
            initialDelaySeconds: 30
            periodSeconds: 10
          livenessProbe:
            httpGet:
              path: /actuator/health
              port: 8080
            initialDelaySeconds: 60
            periodSeconds: 30
This structure uses Helm template syntax ({{ }}) to inject values from values.yaml.
{{ .Chart.Name }} resolves to the name field in Chart.yaml (marketplace).
A few important points to highlight:
readinessProbe and livenessProbe
| Probe | Purpose | On Failure |
|---|---|---|
readinessProbe | Checks if the Pod is ready to receive traffic | Removed from Service endpoints (traffic blocked) |
livenessProbe | Checks if the Pod is alive | Pod is restarted |
Both use Spring Boot Actuator’s /actuator/health endpoint.
The initialDelaySeconds differs between readiness (30s) and liveness (60s) for a reason.
Spring Boot apps take time to start up.
If liveness checks start too early, the app might still be booting and get flagged as “dead,” causing a restart loop.
That is why the liveness initial delay is set longer.
env iteration syntax
{{- range $key, $value := .Values.env }}
- name: {{ $key }}
  value: "{{ $value }}"
{{- end }}
This iterates over the env map in values.yaml and injects environment variables.
To add a new environment variable later, just add a key-value pair to the env section in values.yaml.
No need to modify the template, which simplifies maintenance.
service.yaml
apiVersion: v1
kind: Service
metadata:
  name: {{ .Chart.Name }}
spec:
  type: {{ .Values.service.type }}
  ports:
    - port: {{ .Values.service.port }}
      targetPort: 8080
      protocol: TCP
  selector:
    app: {{ .Chart.Name }}
A Service is a load balancer that sits in front of Pods.
The selector finds Pods with the app: marketplace label and distributes traffic to them.
Since the type is ClusterIP, it is only accessible within the cluster.
External access is handled by Ingress.
ingress.yaml
apiVersion: networking.k8s.io/v1
kind: Ingress
metadata:
  name: {{ .Chart.Name }}
  annotations:
    nginx.ingress.kubernetes.io/rewrite-target: /
spec:
  ingressClassName: nginx
  rules:
    - host: {{ .Values.ingress.host }}
      http:
        paths:
          - path: /
            pathType: Prefix
            backend:
              service:
                name: {{ .Chart.Name }}
                port:
                  number: {{ .Values.service.port }}
This routes requests coming to the marketplace.local host to the marketplace Service.
The Nginx Ingress Controller installed in Part 1 reads this Ingress rule and performs the actual routing.
To access marketplace.local locally, add the following to /etc/hosts:
127.0.0.1 marketplace.localRegistering the ArgoCD Application
Now it is time to tell ArgoCD: “Watch this Git repository and apply changes to the cluster.” This is defined as an Application resource.
Writing the Application YAML
Create an argocd-application.yaml file:
apiVersion: argoproj.io/v1alpha1
kind: Application
metadata:
  name: marketplace
  namespace: argocd
spec:
  project: default
  source:
    repoURL: https://github.com/rhcwlq89/marketplace-deploy.git
    targetRevision: HEAD
    path: helm/marketplace
    helm:
      valueFiles:
        - values.yaml
  destination:
    server: https://kubernetes.default.svc
    namespace: default
  syncPolicy:
    automated:
      selfHeal: true
      prune: true
This single YAML file is the core of the GitOps pipeline. Let us look at each field in detail:
source section
| Field | Description |
|---|---|
repoURL | The Git repository URL to watch |
targetRevision: HEAD | Always tracks the latest commit. You can also specify a branch or tag |
path | Path to the Helm chart within the repository |
helm.valueFiles | Values file to use. For environment separation, you can use values-dev.yaml, values-prod.yaml, etc. |
destination section
| Field | Description |
|---|---|
server | Target cluster. https://kubernetes.default.svc refers to the same cluster where ArgoCD is installed |
namespace | Namespace to deploy resources into |
syncPolicy section
This is the heart of the automation:
| Option | Description |
|---|---|
automated | Automatically syncs when Git changes are detected. Without this, you must manually click the Sync button |
selfHeal: true | If someone manually changes the cluster via kubectl, ArgoCD reverts it to the Git state. Enforces the “Git is truth” principle |
prune: true | If a resource is deleted from Git, it is also deleted from the cluster. Without this, deleting a file in Git leaves the resource in the cluster |
Why is selfHeal important?
In practice, someone inevitably says “it is urgent, let me just kubectl edit this real quick.”
This creates drift — a mismatch between Git and the cluster state.
With selfHeal enabled, ArgoCD detects such manual changes and reverts them to the Git state.
It may feel restrictive at first, but it is a powerful safeguard for long-term environment consistency.
Registering the Application
kubectl apply -f argocd-application.yamlapplication.argoproj.io/marketplace createdCheck the status after registration:
kubectl get applications -n argocdNAME SYNC STATUS HEALTH STATUS
marketplace Synced HealthySynced + Healthy means the Git repository state has been successfully applied to the cluster.
The ArgoCD web UI (https://localhost:8080) gives a more intuitive view. The marketplace Application card shows up in green, and clicking it reveals a tree diagram showing the relationships between all resources — Deployment, Service, Ingress, Pods, and more.
Verifying the GitOps Pipeline
Let us confirm that a Git push actually triggers a deployment.
Changing the Image Tag
In the marketplace-deploy repository, change the image tag in values.yaml:
image:
  repository: marketplace
  tag: v3    # Changed from v2 to v3
pullPolicy: NeverPrerequisite: The new image (
marketplace:v3) must be built and loaded viakind loadbeforehand. In a local environment without CI automation, this part is manual.docker build -t marketplace:v3 . kind load docker-image marketplace:v3 --name marketplace
Git Push
cd marketplace-deploy
git add helm/marketplace/values.yaml
git commit -m "chore: update image tag to v3"
git push origin main
Confirming ArgoCD Auto-Sync
ArgoCD polls the Git repository every 3 minutes by default. When it detects changes, it automatically performs a sync.
Tip: If you do not want to wait 3 minutes, click the
Refreshbutton in the web UI, or runargocd app sync marketplacevia the ArgoCD CLI for an immediate sync.
Once sync completes, you can watch new Pods being created:
kubectl get pods -wNAME READY STATUS RESTARTS AGE
marketplace-xxxxxxxxxx-aaaaa 1/1 Running 0 5h
marketplace-xxxxxxxxxx-bbbbb 1/1 Running 0 5h
marketplace-xxxxxxxxxx-ccccc 0/1 ContainerCreating 0 5s
marketplace-xxxxxxxxxx-ddddd 0/1 ContainerCreating 0 5s
marketplace-xxxxxxxxxx-ccccc 1/1 Running 0 35s
marketplace-xxxxxxxxxx-ddddd 1/1 Running 0 35s
marketplace-xxxxxxxxxx-aaaaa 1/1 Terminating 0 5h
marketplace-xxxxxxxxxx-bbbbb 1/1 Terminating 0 5hKubernetes’ Rolling Update strategy ensures
new Pods come up first (ContainerCreating then Running),
followed by old Pods shutting down (Terminating).
The update proceeds with zero downtime.
Verify the deployed image tag:
kubectl get deployment marketplace -o jsonpath="{.spec.template.spec.containers[0].image}"marketplace:v3The image has been successfully updated to v3.
End-to-End Flow Summary
Here is the complete GitOps pipeline flow:
Developer: Change image.tag to v3 in values.yaml
  |
Developer: git commit & push
  |
ArgoCD: Poll Git repo -> Detect changes
  |
ArgoCD: Render Helm chart (with updated values.yaml)
  |
ArgoCD: Compare rendered result with current cluster state (diff)
  |
ArgoCD: Apply changes via kubectl apply if there is a diff
  |
Kubernetes: Rolling Update replaces Pods
  |
Result: Service running with new image (zero downtime)
The developer’s job is just two steps: edit values.yaml and push. ArgoCD handles everything else automatically.
Verifying selfHeal in Action
Let us also confirm how selfHeal: true works in practice.
Manually change the replica count:
kubectl scale deployment marketplace --replicas=1Check again after a moment:
kubectl get podsNAME READY STATUS RESTARTS AGE
marketplace-xxxxxxxxxx-aaaaa 1/1 Running 0 2m
marketplace-xxxxxxxxxx-bbbbb 1/1 Running 0 15sArgoCD detected that “Git says replicaCount: 2 but the cluster has only 1”
and automatically restored it to 2.
This is the power of selfHeal. If someone accidentally changes a setting during operation, it is automatically reverted to the Git state. The “Git is truth” principle is technically enforced.
Summary
Here is a recap of what this post covered:
| Step | Description |
|---|---|
| GitOps concept | Git = Single Source of Truth. Declarative state management |
| ArgoCD installation | Install via Helm, access web UI, retrieve initial password |
| Deploy repo setup | Write Helm chart in the marketplace-deploy project |
| Application registration | Connect Git repo to ArgoCD, configure automated sync |
| Verification | Change values.yaml, push, confirm auto-deployment |
Current CI/CD status:
CI (build):  Manual -- docker build -> kind load
CD (deploy): Automated -- ArgoCD detects Git changes -> auto-sync
The CI part is still manual. In a production environment, CI tools like GitHub Actions automate this as well. The full flow becomes: code push, image build, registry push, and deploy repo tag update — all automated.
For local practice, however, this is sufficient. The goal is to experience the core concept of “Git push triggers automatic deployment” firsthand.
In the next post, we will install Loki + Grafana on this cluster to collect and visualize Pod logs for a monitoring setup. Deployment is now automated, so it is time to verify “is the deployed app actually running well.”