Setting Up a Local K8s Cluster with kind
Introduction
To study or practice Kubernetes, you need a cluster. There are three main options:
| Tool | Strengths | Drawbacks |
|---|---|---|
| EKS/GKE | Production-grade | Costs money (EKS alone is $0.10/hr) |
| minikube | Easy to install | Single node only, no multi-node practice |
| kind | Multi-node, lightweight, fast | Not meant for production |
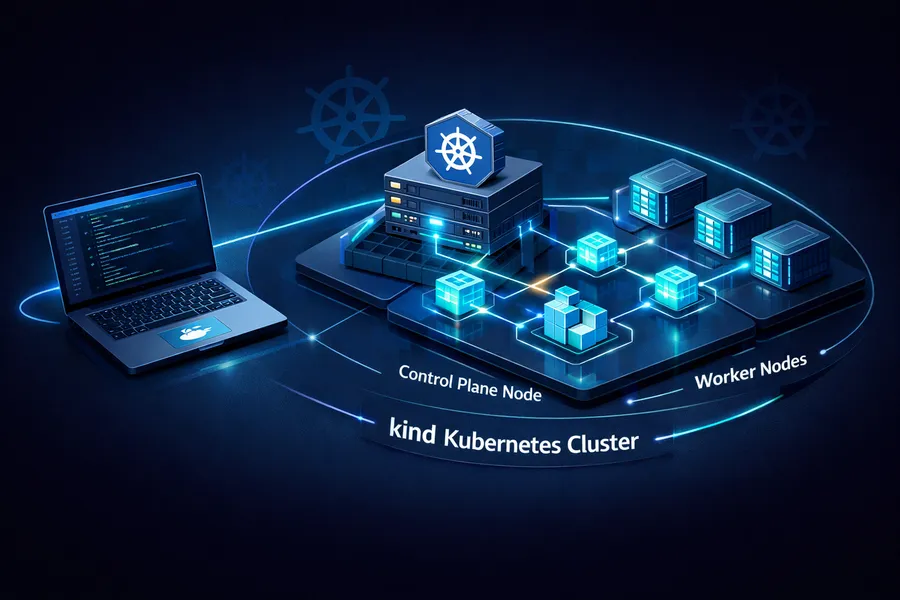
kind (Kubernetes IN Docker) creates K8s nodes inside Docker containers. Each Docker container becomes a K8s node, so you can spin up a cluster with 1 control plane + 2 worker nodes locally in just a few minutes.
After using it for a while, these are the standout benefits:
- Fast: Creating a cluster takes just 1-2 minutes
- Lightweight: Uses Docker containers instead of VMs
- Multi-node: Add as many worker nodes as you want
- Reproducible: A single config file recreates the same cluster every time
This post walks through the entire process of building a local cluster with kind, then building and deploying a Spring Boot application to it.
This is the first post in the Local K8s Practice series.
- This post: Setting Up a Local K8s Cluster with kind
- Part 2: Building a GitOps Pipeline with ArgoCD on kind
- Part 3: K8s Log Monitoring with Loki + Grafana
Prerequisites
Docker Runtime
kind runs on top of Docker, so you need a Docker runtime. Docker Desktop, Colima, or Orbstack all work. This guide uses Orbstack.
Orbstack is a macOS-only Docker runtime that is lighter and faster than Docker Desktop. If you have not tried it yet, you can install it from orbstack.dev.
Verify that Docker is working:
docker versionIf both Client and Server information are displayed, you are good to go.
Installing kind, kubectl, and helm
On macOS, you can install all three with brew:
brew install kind kubectl helmVerify the installed versions:
kind version
# kind v0.27.0 go1.24.1 darwin/arm64

kubectl version --client
# Client Version: v1.32.3

helm version
# version.BuildInfo{Version:"v3.17.1", ...}Note: The kind, kubectl, and helm versions may differ depending on when you run this. Minor version differences should not cause any issues.
Creating a kind Cluster
Writing the Cluster Config File
kind uses a YAML config file to define the cluster structure.
Create a kind-config.yaml file in your project root:
kind: Cluster
apiVersion: kind.x-k8s.io/v1alpha4
nodes:
  - role: control-plane
    extraPortMappings:
      - containerPort: 80
        hostPort: 80
        protocol: TCP
      - containerPort: 443
        hostPort: 443
        protocol: TCP
  - role: worker
  - role: worker
Here is what each setting does:
| Setting | Description |
|---|---|
nodes | Cluster node layout. 1 control-plane + 2 workers |
extraPortMappings | Maps host ports to container ports. Opens ports 80/443 for Ingress |
A quick note on why extraPortMappings is needed:
kind clusters run inside Docker containers.
To access services inside the cluster from your local machine, you need to open ports.
When you install the Nginx Ingress Controller later, traffic will come in on ports 80/443.
Without this mapping, localhost:80 will not reach the cluster.
Creating the Cluster
kind create cluster --name marketplace --config kind-config.yamlYou should see output like this:
Creating cluster "marketplace" ...
 ✓ Ensuring node image (kindest/node:v1.32.2) 🖼
 ✓ Preparing nodes 📦 📦 📦
 ✓ Writing configuration 📜
 ✓ Starting control-plane 🕹️
 ✓ Installing CNI 🔌
 ✓ Installing StorageClass 💾
 ✓ Joining worker nodes 🚜
Set kubectl context to "kind-marketplace"
You can now use your cluster with:

kubectl cluster-info --context kind-marketplace

Have a nice day! 👋
Notice the last line — the kubectl context has been automatically set to kind-marketplace.
No need to switch contexts manually.
Verifying the Cluster
Check the node status:
kubectl get nodesNAME STATUS ROLES AGE VERSION
marketplace-control-plane Ready control-plane 75s v1.32.2
marketplace-worker Ready <none> 54s v1.32.2
marketplace-worker2 Ready <none> 54s v1.32.2All 3 nodes should be in Ready status.
You can also verify using Docker containers:
docker ps --format "table {{.Names}}\t{{.Image}}\t{{.Status}}"NAMES IMAGE STATUS
marketplace-control-plane kindest/node:v1.32.2 Up 2 minutes
marketplace-worker kindest/node:v1.32.2 Up 2 minutes
marketplace-worker2 kindest/node:v1.32.2 Up 2 minutesThree Docker containers, three K8s nodes. This is the core idea behind kind — Docker container = K8s node.
Installing the Nginx Ingress Controller
To route external traffic into the cluster, you need an Ingress Controller. kind officially supports the Nginx Ingress Controller and provides a kind-specific manifest.
Installation
kubectl apply -f https://raw.githubusercontent.com/kubernetes/ingress-nginx/main/deploy/static/provider/kind/deploy.yamlWhat makes this manifest different from the standard Nginx Ingress?
It is configured to use hostPort, which connects to the 80/443 ports opened earlier via extraPortMappings.
Verifying the Installation
Wait for the Ingress Controller Pod to become ready:
kubectl wait --namespace ingress-nginx \
  --for=condition=ready pod \
  --selector=app.kubernetes.io/component=controller \
  --timeout=90s
pod/ingress-nginx-controller-xxxxx condition metTo check the Pod status directly:
kubectl get pods -n ingress-nginxNAME READY STATUS RESTARTS AGE
ingress-nginx-admission-create-xxxxx 0/1 Completed 0 60s
ingress-nginx-admission-patch-xxxxx 0/1 Completed 0 60s
ingress-nginx-controller-xxxxx 1/1 Running 0 60sThe ingress-nginx-controller Pod should be Running.
The admission-create and admission-patch Pods are one-time setup Jobs, so Completed is expected.
Building the marketplace Image
Now prepare the application image for deployment. This guide uses an existing Spring Boot multi-module project (marketplace).
Writing the Dockerfile
Use a multi-stage build to separate the build image from the runtime image, keeping the final image small.
# Stage 1: Build
FROM gradle:8.5-jdk17 AS builder
WORKDIR /app
COPY . .
RUN gradle :module-api:bootJar -x test --no-daemon

# Stage 2: Runtime
FROM eclipse-temurin:17-jre
WORKDIR /app

# Security: run as a non-root user
RUN groupadd -r appuser && useradd -r -g appuser appuser

COPY --from=builder /app/module-api/build/libs/*.jar app.jar

RUN chown appuser:appuser app.jar
USER appuser

ENTRYPOINT ["java", "-jar", "app.jar"]
Here is what each stage does:
| Stage | Base Image | Purpose |
|---|---|---|
| builder | gradle:8.5-jdk17 | Builds the bootJar with Gradle. Heavy image with JDK + Gradle |
| runtime | eclipse-temurin:17-jre | Copies only the JAR and runs it. Lightweight image with just JRE |
Why use multi-stage builds? A single-stage build includes the JDK, Gradle, and source code in the final image. Multi-stage keeps only the JRE + JAR, significantly reducing image size.
The USER appuser line is also important.
Running containers as root creates security vulnerabilities.
In production, always run as a non-root user.
Building the Image
Build from the project root:
docker build -t marketplace:v1 .After the build completes, verify the image:
docker images marketplaceREPOSITORY TAG IMAGE ID CREATED SIZE
marketplace v1 abc123def456 10 seconds ago 280MBLoading the Image into kind
Normally, to use an image in a K8s cluster, you need to push it to a registry like Docker Hub. But kind provides a feature to copy local images directly to the cluster nodes.
kind load docker-image marketplace:v1 --name marketplaceImage: "marketplace:v1" with ID "sha256:abc123..." not yet present on node "marketplace-worker2", loading...
Image: "marketplace:v1" with ID "sha256:abc123..." not yet present on node "marketplace-worker", loading...
Image: "marketplace:v1" with ID "sha256:abc123..." not yet present on node "marketplace-control-plane", loading...This command simply copies the image from your local Docker into each kind cluster node (Docker container). It skips the registry entirely, making it fast and convenient.
Setting imagePullPolicy
There is one thing to watch out for when using images loaded via kind load.
By default, Kubernetes tries to pull images from a registry.
To use a locally loaded image, you must set imagePullPolicy: Never.
In your Helm values.yaml or Deployment manifest:
# values.yaml
image:
  repository: marketplace
  tag: v1
  pullPolicy: Never  # Use local image, do not pull from registry
Or directly in the Deployment:
containers:
  - name: marketplace
    image: marketplace:v1
    imagePullPolicy: Never
If you do not set imagePullPolicy to Never, the Pod will end up in ErrImagePull status.
This is one of the most common mistakes when using local images with kind.
Tip:
imagePullPolicyhas three options:
Always: Always pull from the registry (default when the tag islatest)IfNotPresent: Pull only if not available locally (default for specific tags)Never: Never use the registry. Use local images only
In a kind environment, IfNotPresent also works, but explicitly using Never makes your intent clearer.
Troubleshooting: Redis/Kafka Auto-Config Issues
After deploying the image, the Pod fell into CrashLoopBackOff.
Here is the actual problem and how it was resolved.
v1: CrashLoopBackOff
After deployment, checking the Pod status:
kubectl get podsNAME READY STATUS RESTARTS AGE
marketplace-xxxxx-yyyyy 0/1 CrashLoopBackOff 3 2mChecking the logs:
kubectl logs marketplace-xxxxx-yyyyy***************************
APPLICATION FAILED TO START
***************************
Description:
Failed to configure a DataSource: 'url' is required...
Action:
Consider the following:
If you want an embedded database (H2, HSQL or Derby), please put it on the classpath.
If you have database settings to be applied to a particular profile, ...This is a database-related error, but looking more closely, there was also a Redis connection failure:
org.springframework.data.redis.RedisConnectionFailureException:
Unable to connect to Redis
Root Cause
This is caused by Spring Boot’s auto-configuration.
When spring-boot-starter-data-redis is on the classpath,
Spring Boot automatically tries to connect to Redis.
It does not matter whether the active profile is local or prod.
As long as the dependency is on the classpath, auto-configuration kicks in.
In a local K8s environment without a Redis server, the connection naturally fails and the app crashes.
v2: Excluding Redis Auto-Config
Exclude the Redis auto-configuration in application.yml:
spring:
  autoconfigure:
    exclude:
      - org.springframework.boot.autoconfigure.data.redis.RedisAutoConfiguration
      - org.springframework.boot.autoconfigure.data.redis.RedisReactiveAutoConfiguration
Rebuild and redeploy:
docker build -t marketplace:v2 .
kind load docker-image marketplace:v2 --name marketplace
After updating the Deployment image tag to v2 and redeploying…
this time it crashes with a Kafka connection failure:
org.apache.kafka.common.KafkaException:
Failed to construct kafka consumer
Same principle. If spring-kafka is on the classpath, Kafka auto-configuration activates too.
v3: Excluding Kafka Auto-Config as Well
Add the Kafka auto-configuration exclusion:
spring:
  autoconfigure:
    exclude:
      - org.springframework.boot.autoconfigure.data.redis.RedisAutoConfiguration
      - org.springframework.boot.autoconfigure.data.redis.RedisReactiveAutoConfiguration
      - org.springframework.boot.autoconfigure.kafka.KafkaAutoConfiguration
Alternatively, exclude directly in @SpringBootApplication:
@SpringBootApplication(exclude = {
    RedisAutoConfiguration.class,
    RedisReactiveAutoConfiguration.class,
    KafkaAutoConfiguration.class
})
public class MarketplaceApplication {
    public static void main(String[] args) {
        SpringApplication.run(MarketplaceApplication.class, args);
    }
}
Rebuild and redeploy:
docker build -t marketplace:v3 .
kind load docker-image marketplace:v3 --name marketplace
This time the app starts successfully:
kubectl get podsNAME READY STATUS RESTARTS AGE
marketplace-xxxxx-yyyyy 1/1 Running 0 30sKey Takeaway
The core lesson here is that Spring Boot auto-configuration is classpath-based, not profile-based.
spring-boot-starter-data-redis is on the classpath
  → RedisAutoConfiguration activates
    → Attempts to connect to Redis
      → No Redis in local K8s
        → App fails to start
Even if a given profile does not use Redis, having the dependency on the classpath triggers auto-configuration. There are two ways to fix this:
- Exclude explicitly: Use
@SpringBootApplication(exclude = ...)orspring.autoconfigure.exclude - Separate dependencies by profile: Restructure your Gradle configuration so each module only includes the dependencies it needs
In practice, the common approach is to exclude in a profile-specific config file (application-local.yml)
while keeping auto-configuration active for the production profile.
Summary
Here is a recap of what this post covered:
| Step | Description |
|---|---|
| Prerequisites | Install Docker (Orbstack), kind, kubectl, helm |
| Cluster creation | Configure control-plane 1 + worker 2 with kind config |
| Ingress setup | Install the kind-specific Nginx Ingress Controller |
| Image build | Build the Spring Boot app with a multi-stage Dockerfile |
| Image loading | Transfer the image to the cluster without a registry using kind load |
| Troubleshooting | Fix startup issues by excluding Redis/Kafka auto-config |
You now have a multi-node K8s environment locally that resembles a production setup. Unlike EKS, it costs nothing and can be created or destroyed whenever you need it — ideal for hands-on practice.
To delete the cluster when you are done:
kind delete cluster --name marketplaceThat single command cleanly removes the cluster. Since it is Docker container-based, nothing is left behind.
In the next post, we will install ArgoCD on this cluster and build a GitOps-based automated deployment pipeline. The goal: push to Git and have it automatically deployed to K8s.